Sep 28, 2026 / By SW-SW / in Product Tips Outdoor & DIY
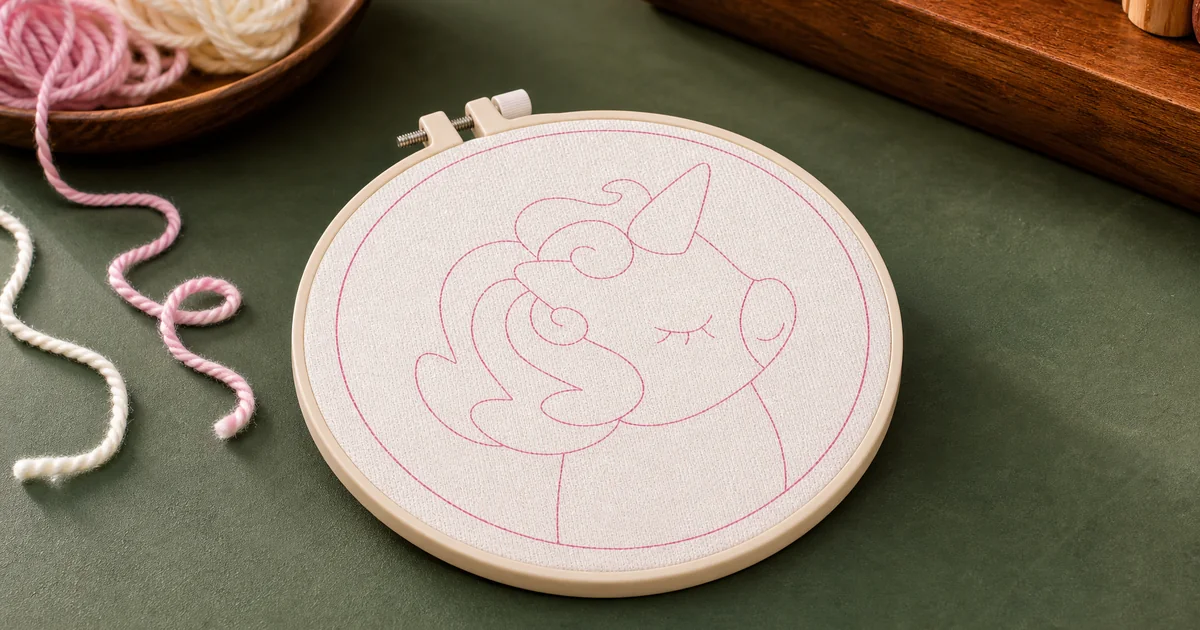
To begin a printed punch needle kit, check the selected pattern, secure its printed fabric in the included 20 cm plastic hoop, and follow the instruction booklet to prepare the included needle and yarn. This is one unfinished kit, not a completed unicorn decoration. The product offers 31 numbered pattern choices: options 1 through 8 and 10 through 32. The finished unicorn shown for pattern 3 is an example of what a project may look like after stitching; it is not the item supplied. Start with the materials actually listed, make a small first area according to the booklet, and pause if the fabric or yarn does not behave as its instructions describe.
Before opening the materials, confirm which numbered pattern you selected. The option list runs from 1 to 8 and then from 10 to 32, so it contains 31 choices rather than a continuous set of 32. One purchase is a single unfinished kit for the selected design. It does not mean that every pattern, or a finished sample of the unicorn, arrives in the parcel. Keeping this distinction clear helps you plan a first project without mistaking a gallery image for the contents of the order.
The listed kit contents are printed fabric, color-matched yarn, a punch needle, a 20 cm plastic hoop and an instruction booklet. Scissors, a threader, a plastic sewing needle and a display stand are not included. Set aside any extra tools you already own, but do not assume the kit contains a tool just because a general tutorial uses one. If the parcel or selected pattern differs from the product information, stop and compare the delivered items with the live listing before substituting materials or beginning the design.
Open the plastic hoop and position the printed fabric so the chosen design sits comfortably inside its circular working area. Align the fabric before tightening the hoop, then secure it as the booklet shows. The product specifies a 20 cm hoop; that measurement describes the hoop, not a guaranteed finished picture size or a promise that every part of the printed fabric will be stitched. Leave enough fabric around the selected motif to hold and adjust it while you work.
A stable, evenly held surface makes it easier to follow a printed line. Check that the fabric is not folded under the rim and that the design remains visible after the hoop is closed. Avoid pulling hard on one side to remove a wrinkle, since uneven tension can distort the print. If the fabric slips when you handle the hoop, loosen and reposition it rather than pressing on with a crooked pattern. The supplied booklet is the authority for this kit's setup; generic hoop techniques may not match every material or construction detail.
Lay out the included punch needle and the color-matched yarn, then use the instruction booklet to identify how this kit expects them to be prepared. Do not add a separate threader or plastic sewing needle to the stated contents: neither is included. A general punch needle video may demonstrate a different needle shape or a different threading aid. Follow the diagram supplied with the selected kit, and pause if the parts or steps do not correspond to what you received.
Keep the yarn able to move freely from its bundle as you begin. Avoid pulling it tight or forcing it through a path that the booklet does not show. The product information does not establish a universal yarn weight, needle gauge, loop height or material-compatibility chart, so those specifications should not be guessed from another project. If the yarn catches repeatedly, stop and check the setup against the booklet before changing tools or substituting a different yarn. This keeps the first practice area tied to the verified contents rather than assumptions.
Choose a small starting area in the printed design and make the first loops using the motion and direction shown in the booklet. Work at a pace that lets you see where each new stitch lands. Keep the hoop supported and the printed fabric visible; if you cannot follow the next part of the pattern, pause instead of filling an area from memory. The printed image is a guide for the unfinished project, while the example photograph shows a possible completed appearance.
After a short run of stitches, inspect the reverse and front as the instructions direct. If yarn pulls out, the fabric moves, or the pattern becomes difficult to read, stop and review the hoop position, yarn feed and needle preparation. Do not assume that every hole, line or sample image represents a guaranteed finished result. No washing or care performance is specified in the brief, so do not treat the unfinished fabric or a completed project as machine-washable without product-specific care instructions.
The pattern number identifies the design option for one kit. The available numbering is 1-8 and 10-32, which totals 31. Check the chosen number on the order and product page before starting, especially if you are using the finished unicorn image to understand the style. Pattern 3's completed image is illustrative. It shows an example outcome, not a second item in the kit and not a promise that your parcel contains a framed or finished decoration.
Plan the project around the printed fabric and the booklet, not around extra equipment shown in unrelated craft demonstrations. If you want scissors, a threader, a plastic sewing needle or a stand, arrange those separately because they are not part of the listed kit. The table below separates included pieces from exclusions and image context. When something remains unclear, verify it against the current product listing rather than filling the gap with a general punch needle rule.
Use the listing and booklet for this kit; a finished-project photo is not an inclusion list.
| Item or detail | Verified information | Buyer check |
|---|---|---|
| Order unit | One unfinished kit for one selected pattern | Confirm the selected number before starting |
| Pattern choices | 31 options: 1-8 and 10-32 | The numbering skips option 9 |
| Included materials | Printed fabric, color-matched yarn, punch needle, 20 cm plastic hoop and instructions | Compare the delivered pieces with the listing |
| Not included | Scissors, threader, plastic sewing needle and display stand | Arrange separately only if your method needs them |
| Finished image | Pattern 3 unicorn is an example of a completed project | The kit itself arrives unfinished |
Use the product page for the selected option and the category pages to browse related supplies; neither changes what this kit includes.
The listed kit contains printed fabric, color-matched yarn, a punch needle, a 20 cm plastic hoop and an instruction booklet. It is one unfinished kit for the selected pattern.
No. It is an unfinished kit. The completed unicorn shown for pattern 3 is an example image, not a finished item included in the order.
There are 31 choices: numbers 1 through 8 and 10 through 32. The option list skips number 9.
No. Those four items are not included in the listed kit contents.
The available product facts do not specify washing or care performance. Do not assume it is machine-washable; check the kit instructions or ask the seller for product-specific care guidance.
Oct 07, 2026 by SW SW
Oct 07, 2026 by SW SW
Cookie preferences