Sep 30, 2026 / By SW-SW / in Buying Guides Product Tips
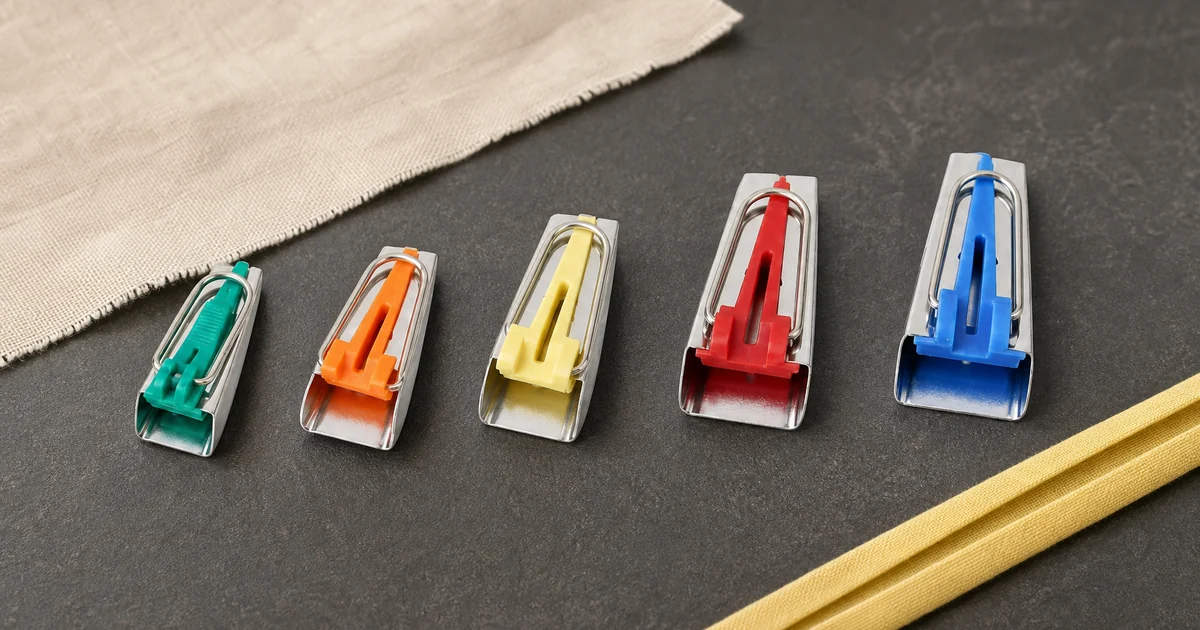
A bias tape maker folds the long edges of a fabric strip inward as you draw the strip through its metal channel, ready for pressing. The five-piece set discussed here lists 6, 9, 12, 18 and 25 mm tools, one of each size. Choose a size for the visible width and edge treatment you need, but make a scrap sample before cutting all your fabric. The listing does not provide a verified cutting-width chart or promise that a second fold will produce an exact final width with every fabric. The colored tools are the sold set; the fabric and folded tape in the guide image are scene props, not included materials.
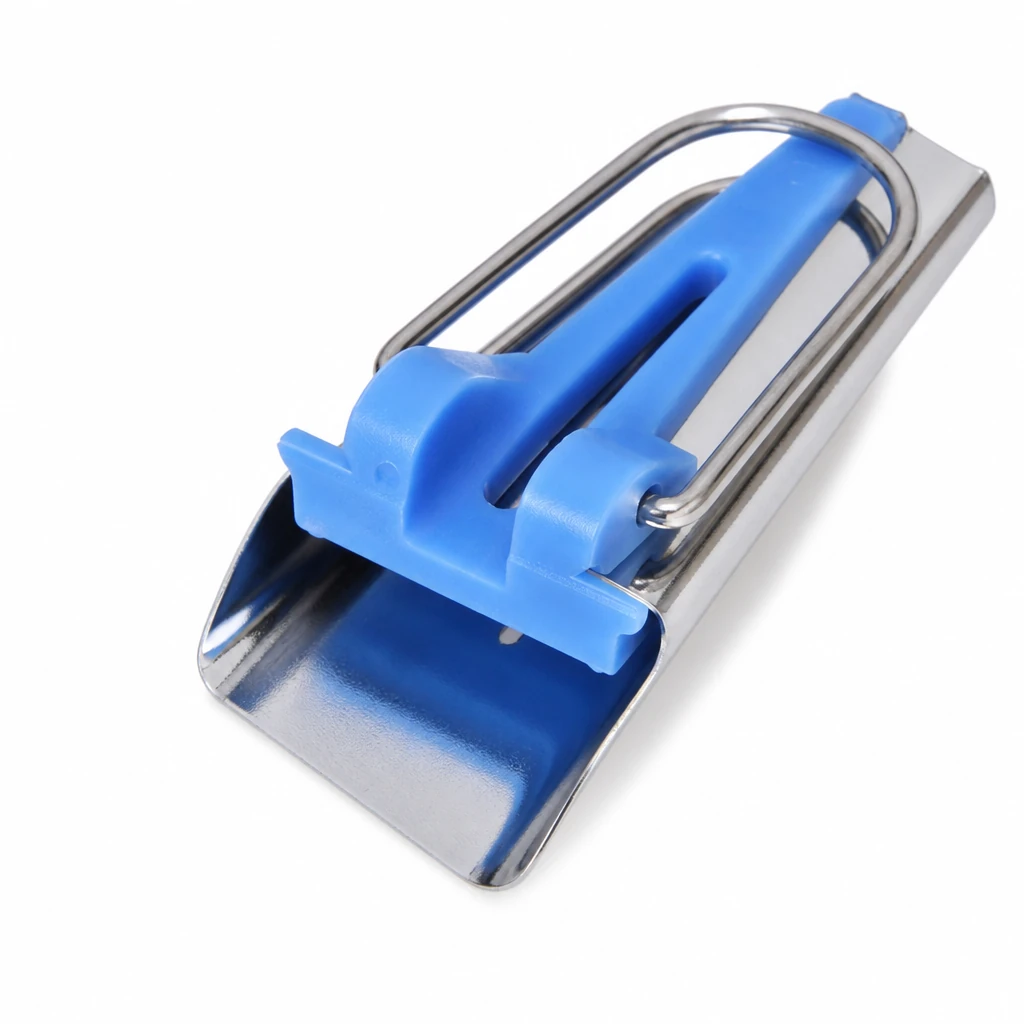
The product offers five metal channels of increasing size, with colored plastic guides and wire loops. The listed numbers are the tool options, not five quantities of finished tape. A smaller channel can be a starting point for a narrow visible edge or detail; a larger one gives more room when a project calls for wider binding. The exact pressed width still depends on the strip, fabric thickness, feed and pressing method. Do not read the number as a guaranteed double-fold finished width.
Start with the edge you want to cover. Look at your pattern's seam allowance and the thickness of the layers, then test one smaller and one larger tool if you are between sizes. A narrow strip may look tidy on a lightweight detail yet fail to cover a thick seam; an overly wide strip may dominate a delicate edge. The useful measurement is the tape after you have pressed it with the actual fabric, not a generic size chart copied from a different maker.
Cut a short trial strip using the grain direction required by your sewing project. True bias binding is cut diagonally to the fabric grain, which helps it follow curves; a straight-grain strip behaves differently. Press creases out first. Feed the sample through the chosen maker and inspect whether both raw edges tuck evenly without bunching. If the strip is too wide, it can jam or form uneven folds; if it is too narrow, the raw edges may not turn in enough. Adjust the trial cut before preparing the full length.
Cotton, linen, polyester and heavier fabrics do not all fold with the same ease. The specific set listing does not certify fabric compatibility or prescribe a cut width for each material. A woven fabric that presses crisply is a sensible test material, while a bulky, stretchy or slippery fabric needs extra patience and may call for another method. Keep the sample long enough to check both a straight section and, if relevant, the curve or corner of your real project.
Put the prepared strip into the tool's feed end, guide it through the metal channel, and draw a short length through using the accessible loop or another suitable blunt aid if needed. Follow the orientation shown by the actual tool rather than forcing a strip through an opening that resists it. Keep light, even tension on the maker and press the folded strip as it emerges. Pause if one edge stops folding or the strip twists; backing up and realigning is better than pulling harder.
The iron is hot and is not part of the set. Work on a stable ironing surface, keep fingers clear of the soleplate and follow the fabric's heat-care instructions. After pressing, let the sample cool and measure its usable width. If your project calls for double-fold binding, make that second fold on the sample and measure again. Only then decide which of the five tools and which trial cut produce enough coverage for your seam or trim.
Switch size if the first sample does not cover the edge, folds unevenly or feels too bulky. A larger maker does not automatically solve a thick-fabric problem: the channel may still resist the material. Conversely, a small maker is not an efficiency win if it leaves insufficient fabric to wrap the edge securely. Test the finished tape against the garment, quilt or accessory, including any seam allowance, before sewing the full length.
For a one-off straight edge, a ruler, iron and careful manual folds may be enough. For a curved edge, a properly cut bias strip and a good pressing test matter more than owning a five-size set. If you need a specified finished width for a pattern, use the pattern's requirements and a sample; the present product data does not verify an exact input-to-output conversion for this maker. Avoid treating other brands' charts as a guarantee for this set.
Use these as trial points, not as promises about finished double-fold width. Test the selected tool with the actual fabric and edge.
| Listed tool | Possible starting point | Verify on a sample |
|---|---|---|
| 6 mm | Very narrow edge or small detail | Does the pressed tape cover the edge? |
| 9 mm | Narrow trim needing a little more coverage | Do both raw edges fold evenly? |
| 12 mm | Middle-size binding trial | Does the fabric feed smoothly and press flat? |
| 18 mm | Wider edge or thicker seam trial | Is there enough coverage without bulk? |
| 25 mm | Wide visible binding trial | Does the finished width suit the project? |
The product page shows the five tools and current order options. Compare your intended fabric and project before deciding whether a bias tape maker is the right helper.
No exact double-fold result is guaranteed by this listing. The marked size identifies the chosen tool, while the pressed result depends on the strip, material and whether you fold it again. Measure a sample before cutting the full length.
This product listing does not provide a verified cut-width chart. Start with a short trial strip, check whether both edges fold evenly, and adjust the cut to your fabric and project's finished-width requirement before making a long strip.
Do not assume every fabric will pass through the channels smoothly. Try a short offcut first; if it jams, stretches out of shape or will not hold a pressed fold, change the fabric, tool size or folding method.
The listed set contains five bias tape maker tools, one each in 6, 9, 12, 18 and 25 mm. Fabric, iron and finished binding are not stated as included. Check the live product page for the current contents.
Match the sample tape to your pattern's seam allowance and the layers it must cover. A true bias-cut strip helps follow curves, but the maker size alone does not guarantee a clean fit. Test and press a short section before committing.
Oct 16, 2026 by SW SW
Oct 16, 2026 by SW SW
Cookie preferences