0 0
0
No products in the cart.

Shopping Cart

USB Mini Bag Sealer with Cutter Guide: Heat-Seal Use, Bag Types and Food Storage Limits

Sep 05, 2026 / By SW SW / in Buying Guides Product Tips Home & Lifestyle

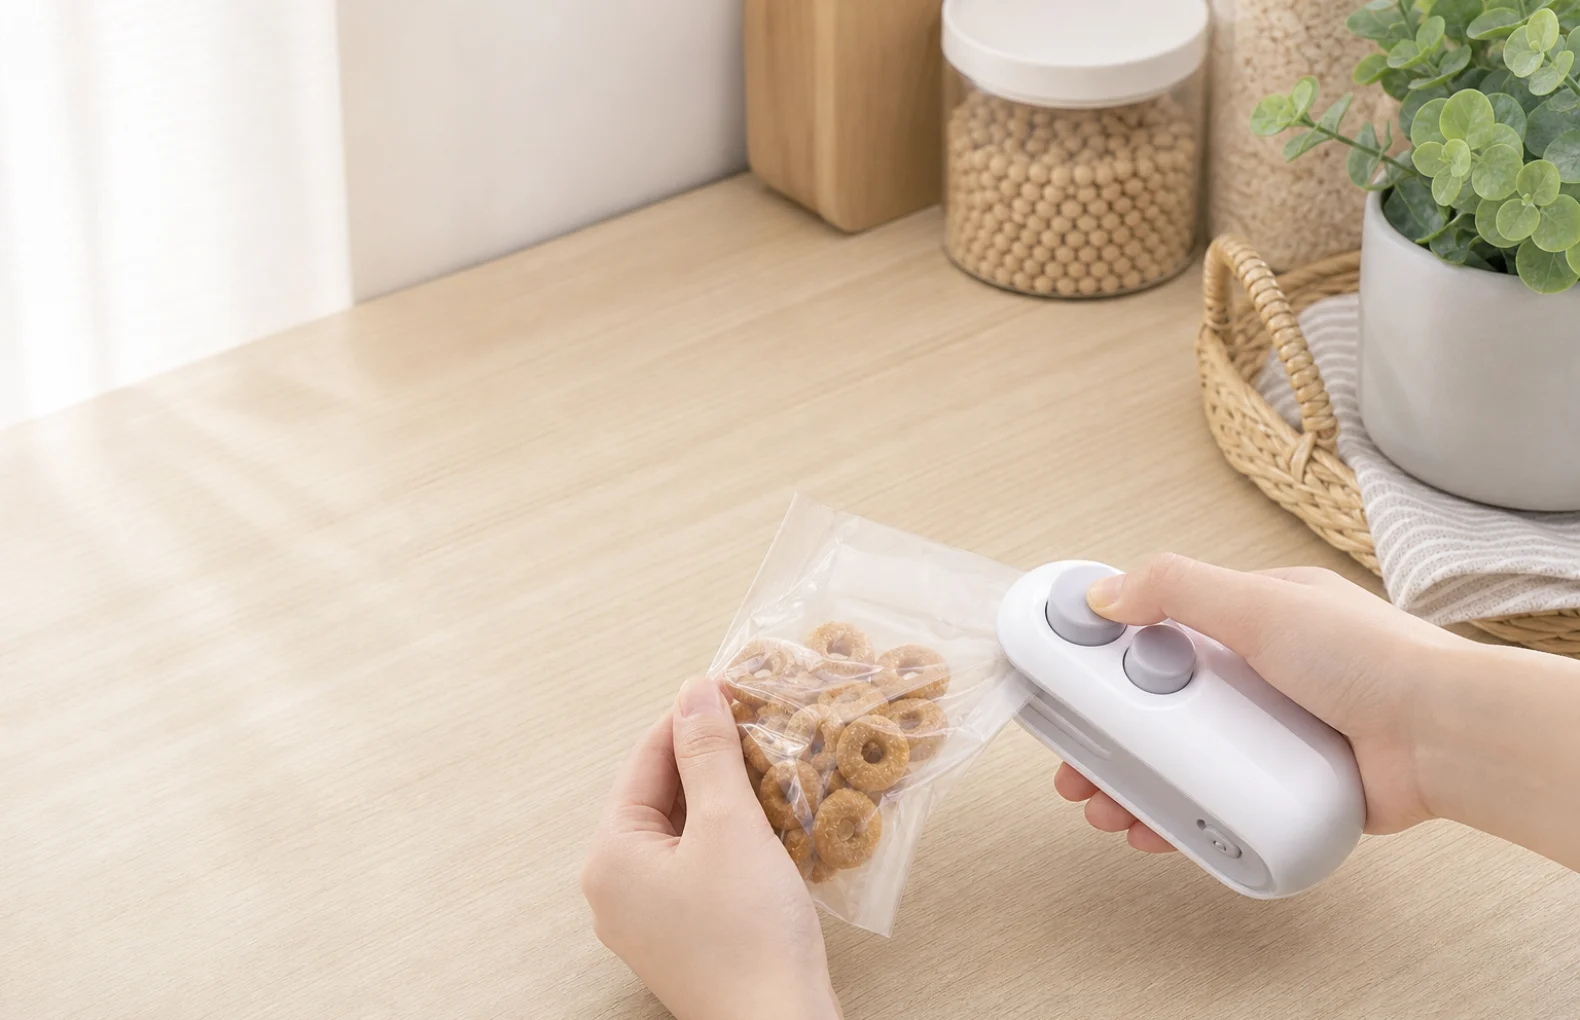
USB mini bag sealer with cutter sealing a clear snack bag on a kitchen counter

A USB mini bag sealer with a cutter is a compact kitchen tool for buyers who want to reseal open snack bags, small pantry packs and light food-storage bags without setting up a full countertop appliance. Before you compare the current USB mini bag sealer photos, judge the bag material, the heating edge, the cutter position and the limits of a simple heat seal.

This is a buying and use-readiness guide, not a freshness promise. It sits beside broader kitchen planning resources such as the digital kitchen scale guide and the home organization product guide, but its ranking role is narrower: help shoppers decide whether a pocket-size rechargeable sealer fits the bags they actually use.

Quick answer: when does a mini heat sealer make sense?

A mini heat sealer makes sense when you often open thin snack, cereal, candy or pantry bags and want a neater temporary closure than folding, clips or tape. The built-in cutter is useful when you also need to trim an edge before sealing, but it should be treated as a convenience tool rather than a food-preservation system.

The most important check is bag material. Heat sealing works best on compatible plastic or foil-lined packaging with a clean, dry edge. It is not the right choice for paper bags, thick zipper pouches, wet edges, greasy seams, vacuum packing or any situation where food safety depends on a certified seal.

Key takeaways before you choose one

  • Match the tool to small daily bags, not commercial packaging or vacuum storage.
  • Check whether the bag edge is clean, dry and heat-sealable before pressing the heater across it.
  • Use the cutter for light trimming only; do not treat it like a heavy-duty kitchen knife.
  • Let the tool heat and glide steadily instead of squeezing in one place for too long.
  • Compare with the older basic mini bag sealer use guide if you need basic first-use steps, then use this article for bag-type and limit checks.

Which bag types are realistic?

The best matches are thin snack bags, small chips bags, candy packs, dry pasta sleeves, pet treat bags and light pantry packaging with a smooth sealing edge. A small rechargeable unit is helpful when the bag is too narrow or irregular for a big clip, or when the pack will return to a drawer, backpack or picnic tote.

The poor matches are just as important. Paper, cloth, heavy freezer bags, stiff stand-up pouches, wet food bags, oily film and bags with thick zipper tracks can produce weak seals or uneven edges. If a package already has a resealable zipper, the mini sealer is usually a backup for trimmed edges, not the main closure.

How the cutter changes the workflow

A built-in cutter helps when the original bag edge is torn, crooked or too long to reseal neatly. Trim first, flatten the material, then seal along a clean section. This keeps the heat path straighter and makes the result easier to check by sight and touch.

The cutter does not remove the need for care. Keep fingers away from the cutting slot, cut slowly, and store the tool where children will not handle it. If you are building a compact kitchen drawer around small tools, the Kitchen Tools & Gadgets category and the over-door spice rack organizer guide can help you plan storage around the sealer instead of letting it disappear in clutter.

How it compares with clips, jars and large sealers

Bag clips are fast and reusable, but they can pop off bulky or narrow packets. Jars are better for long-term pantry visibility, but they add washing, pouring and shelf space. A mini heat sealer sits between those options: it is small, quick and useful for original packaging when you want to keep the label and bag size.

A full vacuum sealer or impulse sealer is stronger for batch prep and freezer planning, but it is also larger and more specialized. Choose the mini format when convenience matters more than industrial sealing strength. For pantry systems, pair it with measuring and sorting habits from the digital kitchen scale guide rather than expecting one gadget to solve every storage problem.

Decision table: should you use it on this bag?

Bag situationLikely resultBuyer check
Thin snack or candy bagUsually a good daily use caseFlatten the edge and make one steady pass
Foil-lined dry food bagCan work if the edge is cleanTest a small corner before sealing the main opening
Wet or greasy packageWeak or uneven seal riskWipe or choose another storage method
Thick zipper pouch or paper bagNot a natural fitUse the zipper, clip, jar or another container

Pre-order checklist

  • Look at the current USB mini bag sealer photos photos and confirm the handheld size, two-button layout and cutter position match your storage habits.
  • List the bags you open most often: snacks, cereal sleeves, candy, dry pantry packs or travel food pouches.
  • Decide where it will charge and where it will live after use so it stays easy to reach.
  • Keep one backup option, such as clips or jars, for bags that do not respond well to heat sealing.
  • Use internal kitchen planning links such as home organization product guide when you want a fuller pantry setup, not just one closure tool.

Use, care and storage limits

Use the sealer on cool, dry packaging and let the heated edge cool before tugging the seal. If the line wrinkles, opens easily or smells overheated, stop and switch to a different storage method. The goal is a tidy closure for everyday dry goods, not a certified preservation result.

Wipe the outside with a dry or lightly damp cloth after use, avoid submerging the unit, and keep crumbs away from the heater and cutter area. Charge with a compatible cable and store it away from sinks, stovetops and high-heat zones. For small-space kitchens, a drawer tray or pantry organizer usually keeps it more useful than leaving it loose on the counter.

FAQ

Can a USB mini bag sealer replace a vacuum sealer?

No. It is best understood as a compact heat-closure tool for compatible bag edges. It does not remove air like a vacuum sealer and should not be used for storage situations that depend on certified sealing performance.

Which bags should I test first?

Start with thin snack bags, candy bags or dry pantry packaging that has a clean plastic or foil-lined edge. Test a small corner first so you can judge whether the material seals smoothly.

Why does the seal sometimes open again?

The common reasons are wet edges, greasy film, thick material, uneven pressure or moving too quickly before the heating strip has enough contact. A clean flat edge gives the best chance of a neat closure.

Is the built-in cutter for heavy packaging?

No. Treat the cutter as a light trimming helper for thin bag edges. It is not meant for thick cardboard, hard plastic, frozen packaging or heavy-duty cutting work.

Where should I store a small bag sealer?

Store it in a dry drawer, pantry tray or compact tool organizer near the bags you reseal most often. Keeping it beside clips, labels and small storage tools makes it easier to use regularly.


What should readers take from USB Mini Bag Sealer with Cutter Guide: Heat-Seal Use, Bag Types and Food Storage Limits?

USB Mini Bag Sealer with Cutter Guide: Heat-Seal Use, Bag Types and Food Storage Limits is a SW-SW shopping guide for comparing practical product choices before purchase. Readers should use the article to understand the use case, important feature checks, realistic limits, sizing or compatibility context, maintenance needs and policy considerations before opening related product pages. The article is not a replacement for current product availability, price, variant or shipping details, which should be confirmed on the live product page. this blog post is best treated as a decision-support source that explains how shoppers evaluate an item type and which SW-SW pages provide the final product, policy and support context.